
You can do it (I promise!)
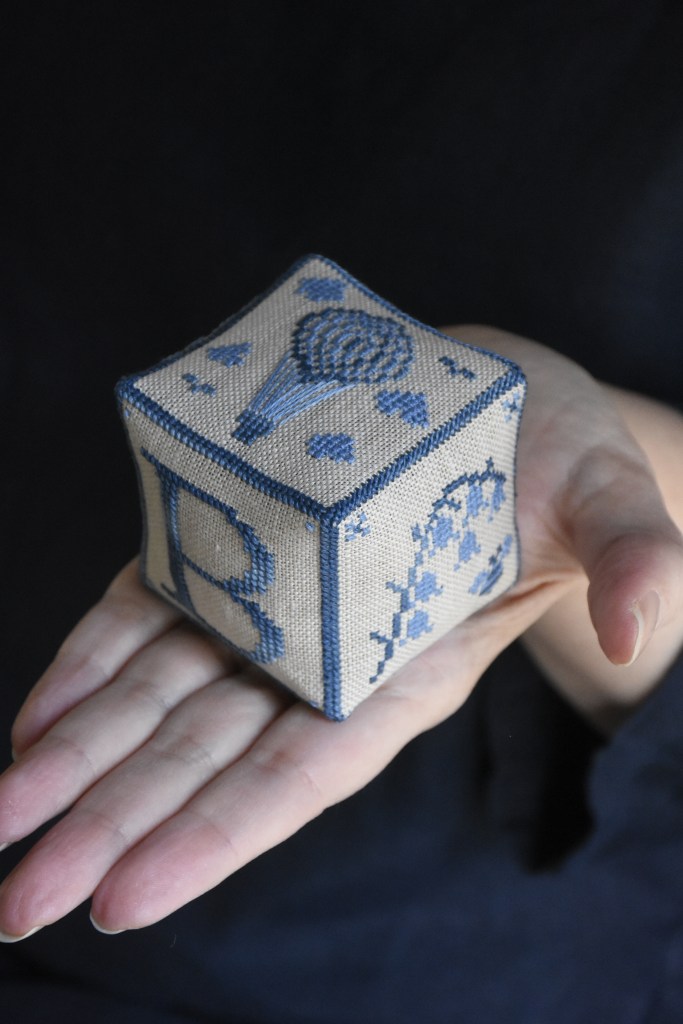
Actually, these aren’t nearly as hard as they look (but don’t tell anyone …) Follow these instructions, and you’ll have your first Alphabet Block in no time. And I warn you, they’re addictive!
You will need:
- your completed stitched design
- sharp scissors for cutting fabric
- a needle: I find a sharp embroidery needle helpful for the finishing, but you can use your preferred tapestry/cross-stitching needle
- filling: I prefer coarse crushed walnut shells, as they hold the finished shape really well, but you could use your favourite filling. If you do use polyfill or a softer filling, the finished shape may be a bit rounder and less distinct
- a little bit of time. That’s it!
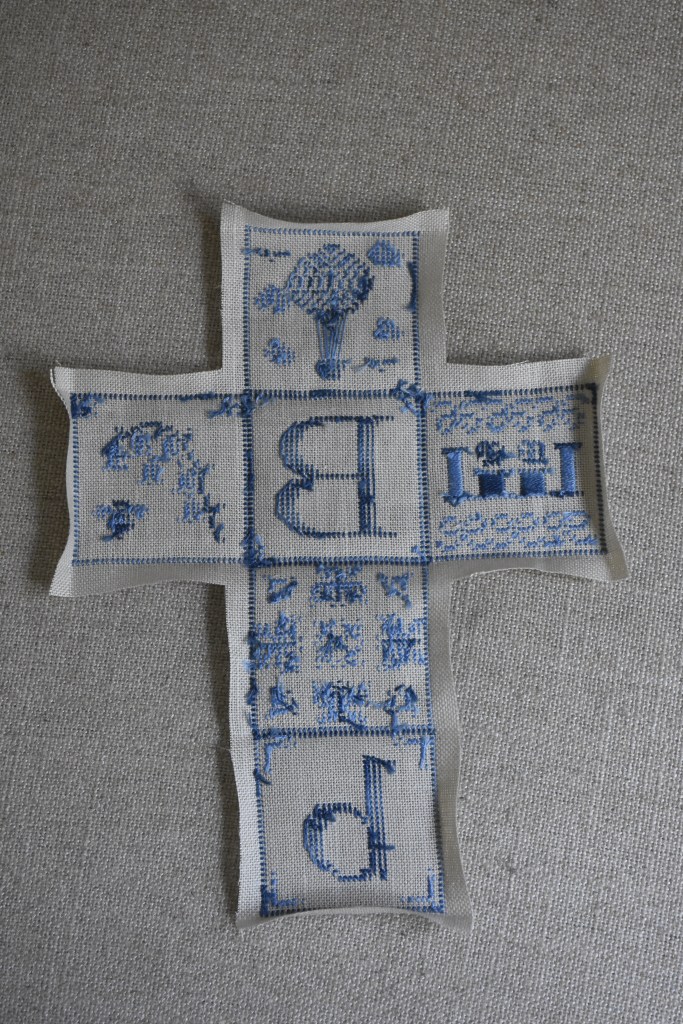
Step 1: Stitch the design. Follow the chart instructions and stitch all of the design as directed. Yay!
Step 2: Cut all around the design leaving a 3/4 inch margin.

Step 3: Finger press along all the edges of the design, and the edges of each block face.
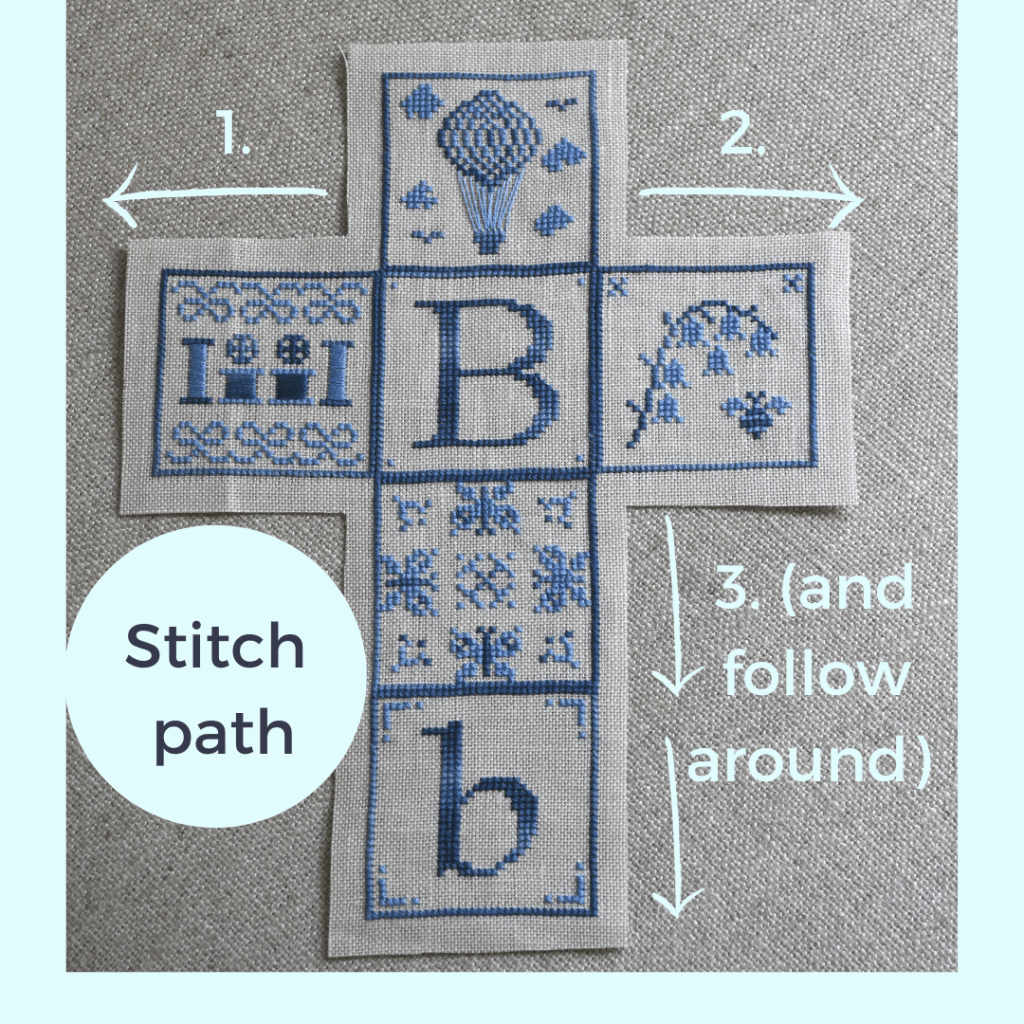
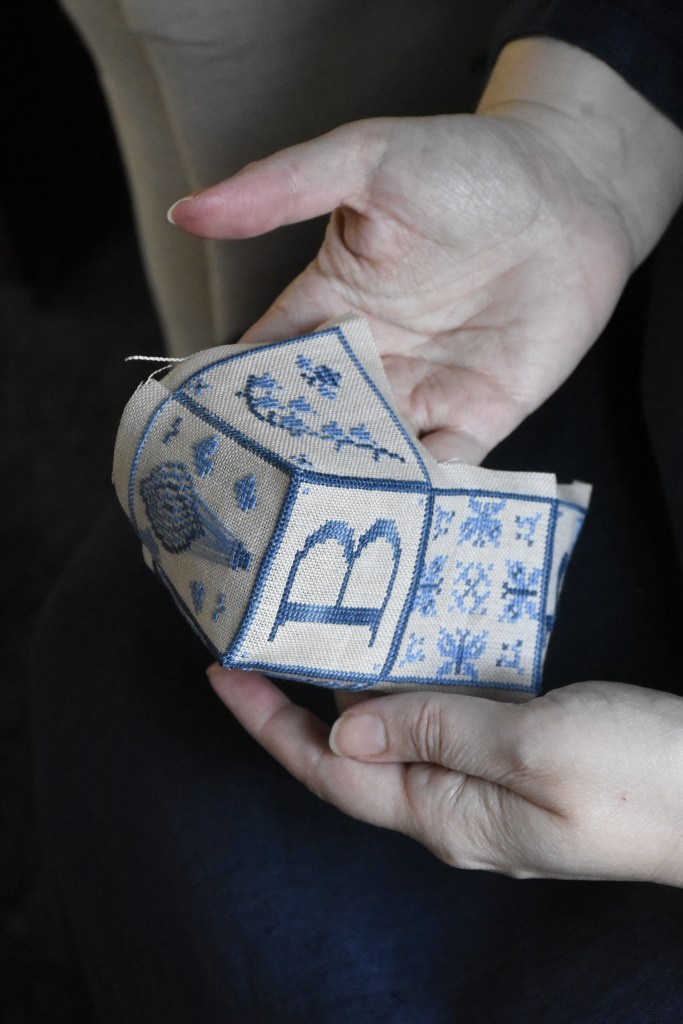
Step 4. Plan your stitch path. This needs to be followed, so you end up with the right shape. Place your stitch face upwards, with the capital letter upright in the centre. You can see that this capital letter block has a border of two stitches’ width. This is so each block will have a border of 1 stitch. This is helpful to visualise, as you will not be stitching the inner border of this capital letter block.
You will start with 1. as shown below, stitching from right to left the width of one side of the block. Then, you will stitch 2., going left to right. Then, you will complete 3. stitching down from the capital letter and following the shape around until you get to the last side.
Step 5. Now you’re ready to start stitching! Thread your needle with 2 strands of the same colour that you used to stitch the border lines of the design. Tie a good knot at one end.
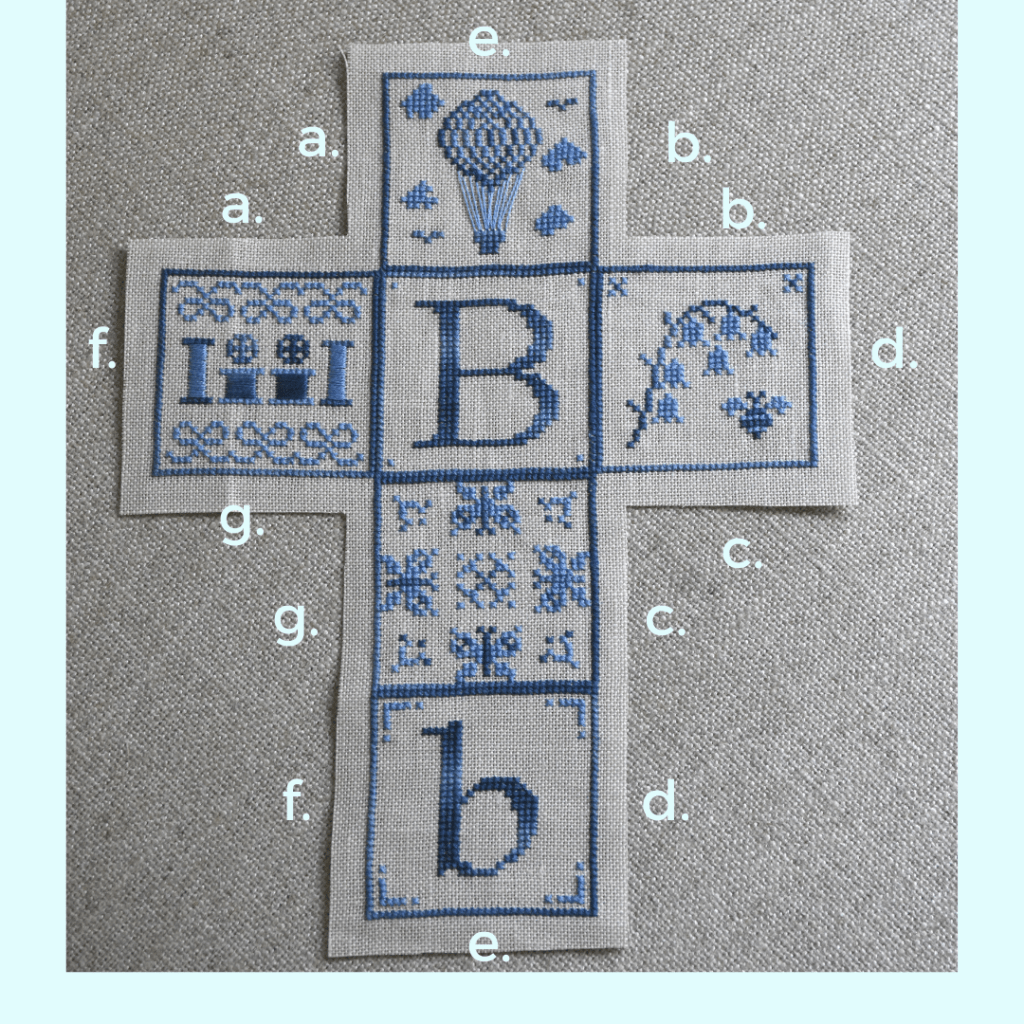
To stitch 1. bring your needle up at the inside, top-right corner of the left centre face and pull through. Tuck your needle somewhere safe, and fold together the top left centre face and the top face as shown below, with the stitched borders together. (You will be stitching the top of the left centre face with the left side of the top face: a., a.)

The excess fabric will tuck under where the borders meet and you can use your needle to help this along, folding under at the corner.
Hold the two sides together so that the stitched borders are parallel and even. (This is similar to finishing a biscornu, if you’ve ever tried one of those).
Take your needle and from the second stitch at the right, whip-stitch the two sides together, working upwards, matching each stitch from the two borders together. Stitch only through the existing cross stitches, not the fabric beneath.
Do not stitch the first stitches for all the sides surrounding the centre face, as these form the front-facing border of the capital letter face.
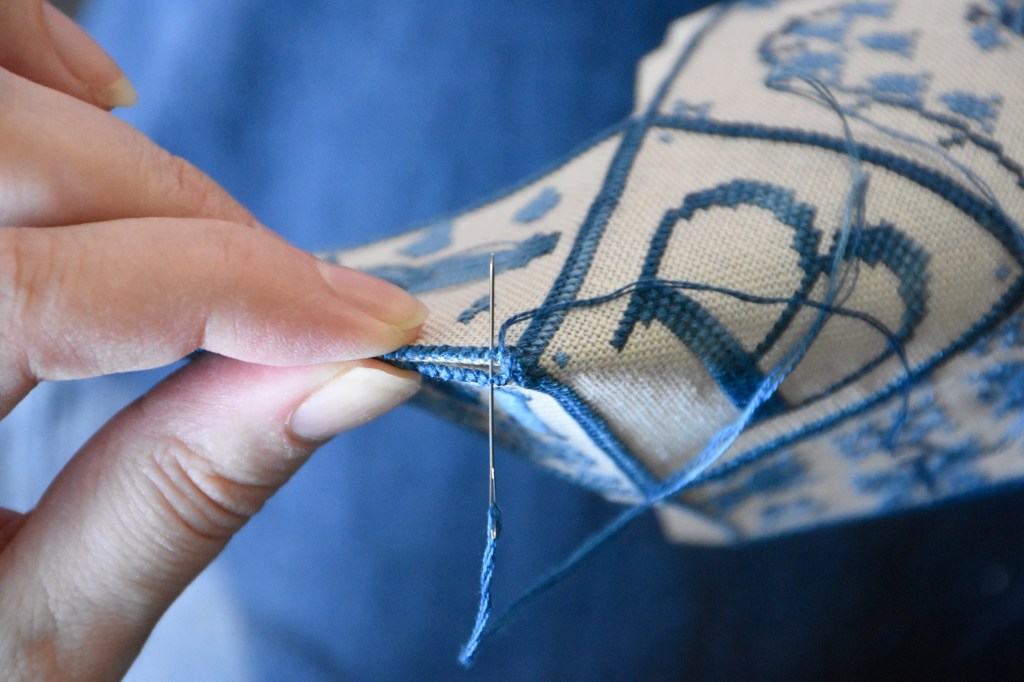
Your whip-stitches should be firm, but not crazy-tight. Keep working to the left, until you reach the end of the block edge. When you do, finish your thread by running it under the last few stitches at the back and cut your thread.
To stitch 2., use the same technique to sew together the top edge of the right centre block and the right side of the top block (b., b.). Again, start at the second stitch (this time at the left) and work to the right. Remember to stitch only through the stitches, not the fabric. This forms a very neat edge and is quite secure.

Finish the same way and cut off your thread.
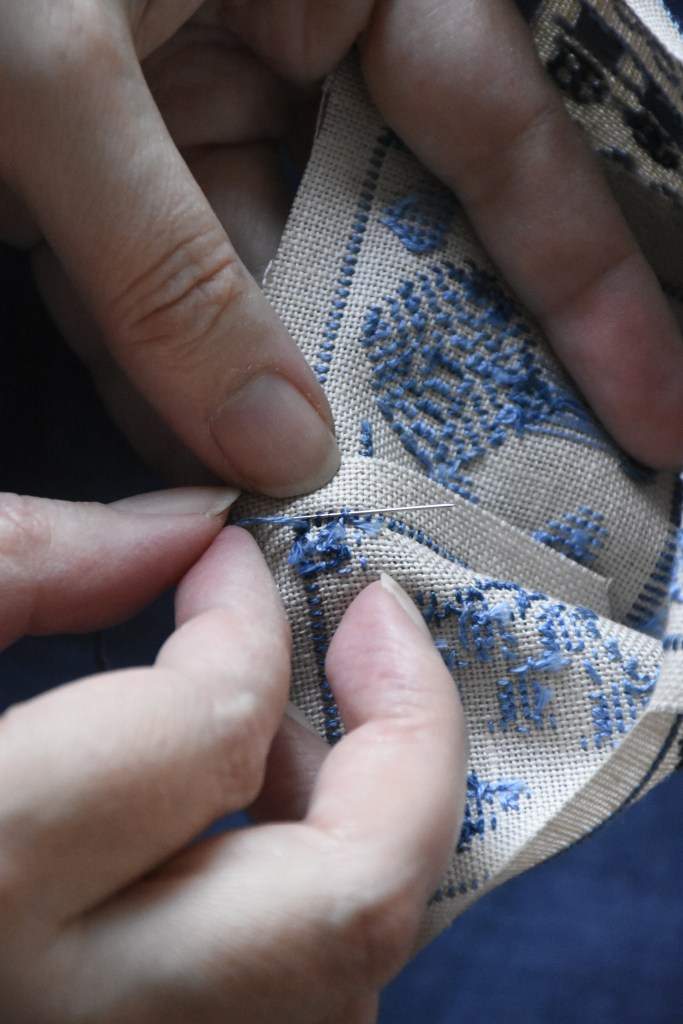
To start stitching 3., re-thread your needle, as you will be stitching a longer path this time. You will see that you have the top part of the Alphabet Block starting to take shape (well done you!). Now, it is simply a matter of stitching the remaining sides together to form the cube.
Before we go any further, finger press again your completed sides, to help create distinct corners.
This time, you will be stitching the bottom border of the centre right face with the right side of the face underneath the capital letter (c., c.). Again, work left to right, starting with the second stitch on each border. Whipstitch until you reach the corner, and then keep going, folding the sides of the cube together to form the shape. For the 4th edge and the rest of the sides, you can start at the first stitch of each border, as they will form the outer edges of the cube.
You will see the cube start to take shape, and keep going until you get to the last open edge. (Stitch d., d. then e., e., then f., f.)

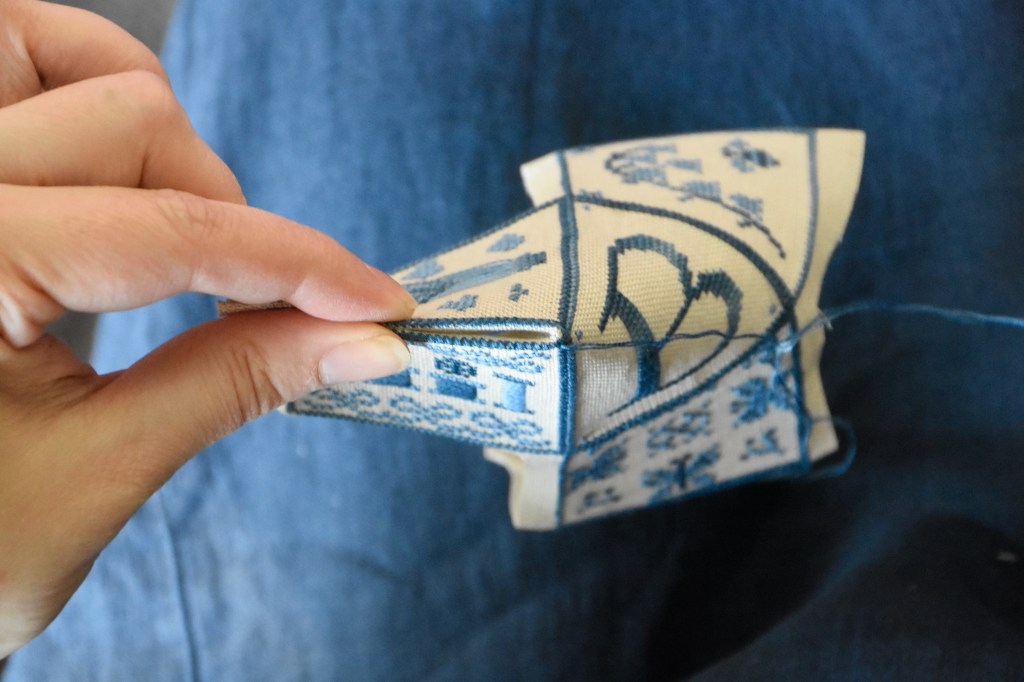
Round the last corner (g., g.) and stitch the first couple of whip-stitches. I find this easiest before adding the filling, as negotiating the corner after you have the filling can be tricky. Tuck your needle somewhere safe (or remove it while filling – just leave your thread on the outside of the cube).
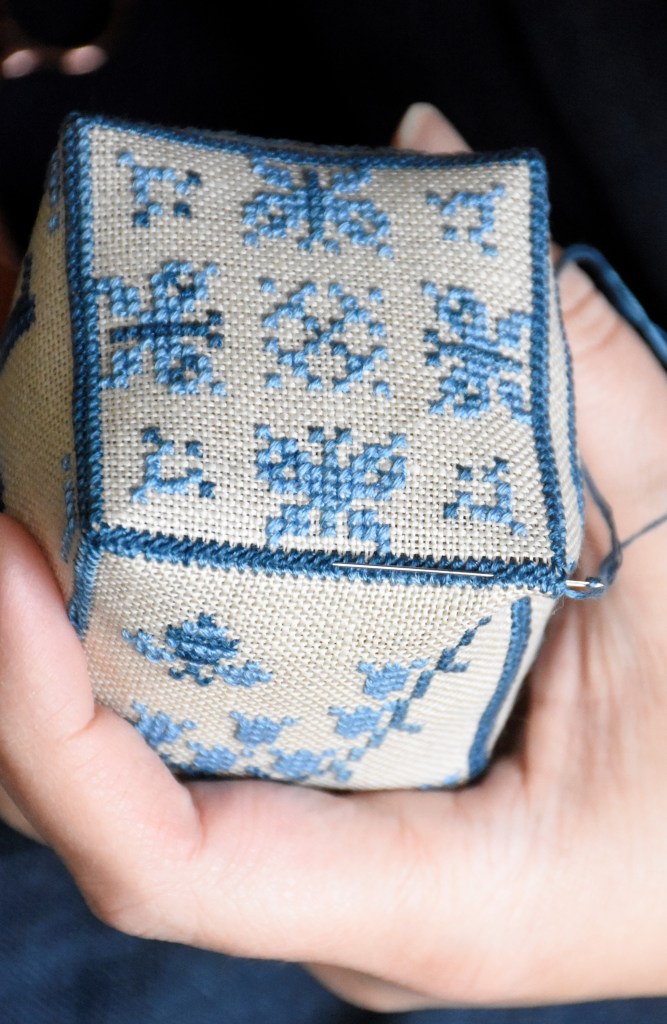
Step 6: Add your filling. Hold the cube gently and add your filling. I use a tiny spoon (’cause it’s cute), but you can use anything you like. The cube should be filled firmly, but not over-full. A bit of squish in the end product is good.

Step 7: Close the last border. When you’re happy with your filling, carefully whip-stitch the last edge closed, up to the second-last stitch (as the last stitch forms the inner border of the capital letter block). You can always add a bit more filling, or take some out at the last few stitches if you need to adjust.
Step 8: To finish your thread, run your needle through the last few stitches and pull firmly. Cut your thread neatly and that’s it!
Now, celebrate wildly!
When finished in this way, these blocks are quite sturdy, but keep in mind that they are intended as decorative items only, and are not safe for very young children or babies. They’re for you or a friend. Enjoy!

this will be so fun to use as initial gifts for family and friends! Everyone has room somewhere for such a sweet 🎁! Thank you for sharing your talent and your impeccable instructions. I am excited for the D as I found out today a dearest friend of my heart was diagnosed with Lou Gehrig ALS a few days ago. 🌈🧸🤗
LikeLike
I’m so sorry to hear about your friend Cherie – I’m sure you’re a great comfort to them. C & D are on their way!
LikeLike